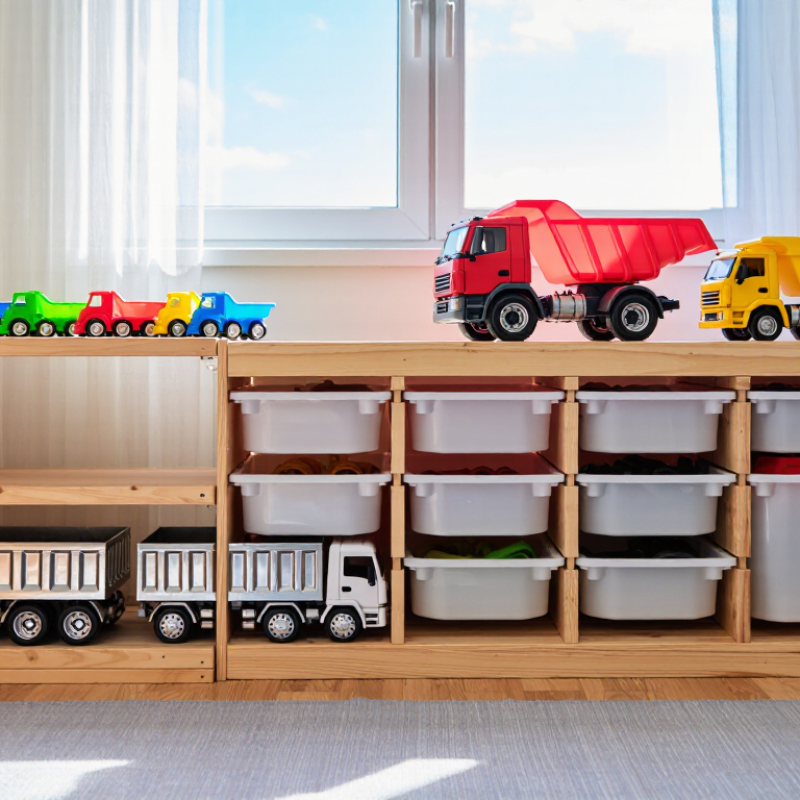
A toy truck collection can begin with one bright red dump truck and quietly grow into a crowded shelf, storage bin, and bedside table. The question is practical: How to organize a toy truck collection? A reliable answer starts with visibility, safety, and regular review rather than expensive furniture. Collection size, truck scale, child age, and play habits should guide every decision.
Industry data shows why thoughtful organization matters. Circana’s Global Toy Industry Performance report for 2023 recorded a 7% decline in toy sales across twelve major markets, while average prices continued rising. Each truck therefore deserves useful care, especially when families replace fewer toys. The Toy Association also identifies parents’ continuing interest in durable, engaging play products. A well-organized collection protects that value and makes daily play easier.
Measure the space first. Leave room for a child’s hands, not only for display. Group trucks by function, scale, material, or frequency of use. Keep large metal vehicles on a low shelf, while smaller plastic trucks can sit in labeled trays. Photographing rare models can support a simple inventory, although photographs alone do not prove authenticity or market value. That part is easy to overestimate. Labels should use clear words and large print. A small “work trucks” bin may work better than a complicated catalog. Review the collection every few months. Some trucks will be favorites; others may only occupy space. The imperfect truth is that organization needs adjustment. Children change, shelves fill, and yesterday’s perfect system may fail tomorrow.
Assessing and Cataloging the Toy Truck Collection
Assessing a toy truck collection begins with a careful physical review. I place each model on a clean, well-lit table. Then I record its scale, material, color, moving parts, and visible markings. A soft brush removes dust without scratching delicate surfaces. I avoid washing older pieces before checking their paint and decals. Water can cause unexpected damage.
Cataloging works best when every truck receives a unique inventory number. I use a spreadsheet with fields for model type, estimated year, condition, accessories, and storage location. Clear photographs show the front, rear, underside, and any imperfections. Close images help confirm small details later. I also rate condition consistently, such as excellent, good, fair, or damaged. My early records were too subjective. “Good condition” meant different things on different days.
Reliable documentation includes purchase dates, previous owners, and available receipts, when known. I never guess uncertain information. Instead, I mark it as unverified and add a follow-up note. Comparing measurements and construction details can reveal duplicate models. It can also expose missing parts. A second review after several weeks often finds mistakes. Keep the process simple. Recheck unusual entries before storing each truck in an acid-free box, with its number visible on the label.
Sorting Trucks by Type, Size, Age, and Condition
How to Organize a Toy Truck Collection Efficiently?
A useful collection starts with clear categories, not expensive storage. I sort trucks by type, such as dump trucks, cargo carriers, construction vehicles, and rescue vehicles. This makes playtime easier because similar toys stay together. I use shallow bins so children can see every truck without emptying the entire shelf. Small labels also help maintain the system.
Size matters when choosing storage. Large trucks need wide spaces, while small trucks fit safely in divided trays. I keep different sizes separate to prevent scratches and accidental crushing. Age adds another helpful layer. Older trucks with metal parts or fragile details deserve a quieter shelf. Newer plastic trucks can stay in everyday play bins. I also record the approximate purchase year, although my memory is not perfect. That uncertainty should be noted rather than disguised as fact.
Condition checks keep the collection reliable. I mark each truck as excellent, played-with, damaged, or needing cleaning. Loose wheels, missing parts, and faded paint should be recorded honestly. A simple notebook can list the truck’s type, size, age, and condition. This record prevents duplicate purchases and shows which pieces need attention. I once stored a dusty truck with clean models, so I now inspect every item before shelving it.
Tips: Use removable labels. Measure shelves first. Clean gently with mild soap and water. Keep delicate trucks away from heavy ones. Review the categories every few months, because a system that looks perfect today may become awkward later.
How to Organize a Toy Truck Collection Efficiently?
Sorting trucks by type, size, age, and condition
This 48-truck collection audit groups vehicles by truck type and condition. For efficient storage, place the most common types together, separate small, medium, and large models, keep older or fragile pieces in protective containers, and label shelves by condition for faster access.
Choosing Efficient Storage for Different Truck Categories
A toy truck collection becomes easier to manage when storage matches each truck’s size, weight, and play value. I separate everyday vehicles from fragile display pieces before buying containers. Small die-cast trucks fit well in shallow drawer organizers. Their compartments prevent scratches and reduce noisy piles. Clear dividers also make missing vehicles easier to notice.
Larger construction trucks need deeper bins with strong sides. I place the heaviest models on lower shelves to reduce tipping risks. Open shelving works better for frequently used trucks because children can see and return them quickly. For delicate models, padded compartments provide safer protection than loose storage. Keep similar categories together, such as emergency vehicles, transporters, farm trucks, and racing trucks. Use simple labels with words and small drawings.
My first arrangement looked neat but failed during playtime. The smallest trucks became buried under larger ones. I now leave some empty space in every bin. That small gap matters. It protects wheels and makes handling less frustrating. Measuring the longest truck before choosing storage prevents wasted space. Still, measurements can change as the collection grows. I sometimes rearrange shelves after adding only a few new models. Dust covers help display areas, although they make access slightly slower. A practical system should protect the trucks without turning play into a daily search.
How to Organize a Toy Truck Collection Efficiently? - Choosing Efficient Storage for Different Truck Categories
| Truck Category |
Typical Scale or Length |
Recommended Storage Method |
Suggested Compartment Size |
Approximate Capacity |
Protection Priority |
Organization Tip |
| Miniature Trucks |
1:64 scale; approximately 7–9 cm long |
Compartment organizer with adjustable dividers |
10 × 6 × 5 cm per compartment |
24–48 trucks per organizer |
Dust control |
Sort by vehicle type or color, and place the most frequently used trucks in the front row. |
| Small Die-Cast Trucks |
1:50–1:55 scale; approximately 9–13 cm long |
Stackable parts trays with padded dividers |
15 × 8 × 7 cm per compartment |
12–24 trucks per tray |
Scratch prevention |
Use one compartment for each vehicle type, such as dump trucks, tow trucks, and mixers. |
| Medium Construction Trucks |
1:32 scale; approximately 14–20 cm long |
Open-front storage bins or cube shelves |
25 × 20 × 18 cm per section |
6–10 trucks per section |
Easy access |
Keep heavier models on lower shelves to reduce tipping and make the storage unit safer. |
| Large Toy Trucks |
1:16–1:24 scale; approximately 20–35 cm long |
Deep open bins or reinforced shelving |
40 × 30 × 25 cm per section |
2–4 trucks per section |
Weight support |
Measure the truck with raised parts, such as crane arms or ramps, before choosing a shelf. |
| Remote-Controlled Trucks |
Approximately 25–45 cm long |
Dedicated shelf with removable charging container |
50 × 35 × 30 cm per section |
1–2 trucks per section |
Cable safety |
Store controllers and cables in a labeled pouch; remove rechargeable batteries during long-term storage. |
| Truck-and-Trailer Sets |
Approximately 30–60 cm when connected |
Long open shelf or under-bed storage box |
70 × 35 × 25 cm per section |
1–3 complete sets |
Set completeness |
Keep the truck and trailer together and use a separate labeled bag for detachable accessories. |
| Building and Assembly Trucks |
Approximately 15–35 cm long; loose parts included |
Clear lidded box with small-part containers |
35 × 25 × 20 cm per box |
2–5 kits per box |
Part tracking |
Store manuals and small components in a sealed envelope inside the same box as the model. |
| Vintage or Display Models |
Varies; commonly 10–30 cm long |
Individual display case or glass-front cabinet |
At least 5 cm clearance on every side |
1 model per display space |
Light and dust |
Avoid direct sunlight and leave enough clearance to remove each model without touching adjacent pieces. |
Creating an Accessible and Attractive Display System
An efficient toy truck display should make every vehicle easy to see, reach, and return.
I measure each truck’s length before choosing shelves. Shallow shelves prevent hidden rows and reduce accidental tipping. Leave two fingers of space between vehicles. This small gap helps children remove one truck without disturbing others.
I group trucks by size, function, or color, depending on the child’s habits. Construction vehicles usually belong together, while smaller trucks fit well in divided trays. Place everyday favorites between waist and eye level. Store delicate models higher, away from busy hands. Clear labels with words and simple pictures support independent sorting. A low, sturdy shelf is safer than a tall, crowded cabinet.
Keep the display attractive, but do not sacrifice access. Use one rotating section for seasonal or recently discovered trucks. Photograph each shelf after arranging it. The image becomes a quick reference during cleanup. Dust the shelves weekly and check loose wheels regularly. My first layout looked impressive, yet the back row became unreachable. I had mistaken fullness for good organization. Now I leave empty space at the front and review the arrangement monthly. Some categories still change.
That is useful information, not failure.
Maintaining, Updating, and Expanding the Collection
A well-organized toy truck collection needs regular care, not just attractive shelves. I keep each truck in a padded, dust-free compartment with enough space around fragile parts. Every few months, I use a soft brush and a slightly damp cloth to remove dust. Water should never touch metal joints or painted details for long. Small details matter.
I maintain a simple record with the truck’s scale, material, purchase date, and current condition. A few photographs help me notice fading, loose wheels, or missing accessories. I avoid harsh cleaners because they can damage plastic and printed surfaces.
My system is not perfect. I sometimes forget to update the notes after rearranging the display. That mistake makes future checking slower.
When the collection grows, I review its direction before buying another truck. I may focus on construction vehicles, unusual colors, or different historical designs. This prevents crowded shelves and repeated purchases. New additions should fit the available space and have a clear purpose. I also leave one empty compartment for future finds. If a model needs repair, I label it and store it separately until I can assess the damage properly. For valuable or delicate pieces, I compare repair advice from museum guides, experienced collectors, and reliable preservation sources. Expanding slowly usually protects both the collection and the collector’s budget.
Conclusion
How to organize a toy truck collection? Start by assessing every item and creating a simple catalog with details such as type, scale, age, material, color, and condition. This inventory helps identify duplicates, valuable or fragile pieces, and trucks that may need cleaning or repair. Next, sort the collection into practical groups, such as construction trucks, emergency vehicles, transport trucks, military-free utility vehicles, vintage models, and modern designs. Size and condition should also guide the arrangement, keeping delicate or older toys separate from sturdy play pieces.
Choose storage that protects the trucks while making them easy to find, including labeled boxes, divided drawers, shelves, or transparent containers. For an attractive display, place favorite models at eye level and arrange others by color, theme, or size. Leave enough space for safe handling and regular dusting. Review the catalog periodically, update changes, and expand thoughtfully by setting collecting goals and maintaining consistent organization.

 Turbo Truck